How to create a course

Course creation is available to users in the group Global Admin or Learning Admin
To create a course, go into the Administration tab of the Learning page, and click Create Course.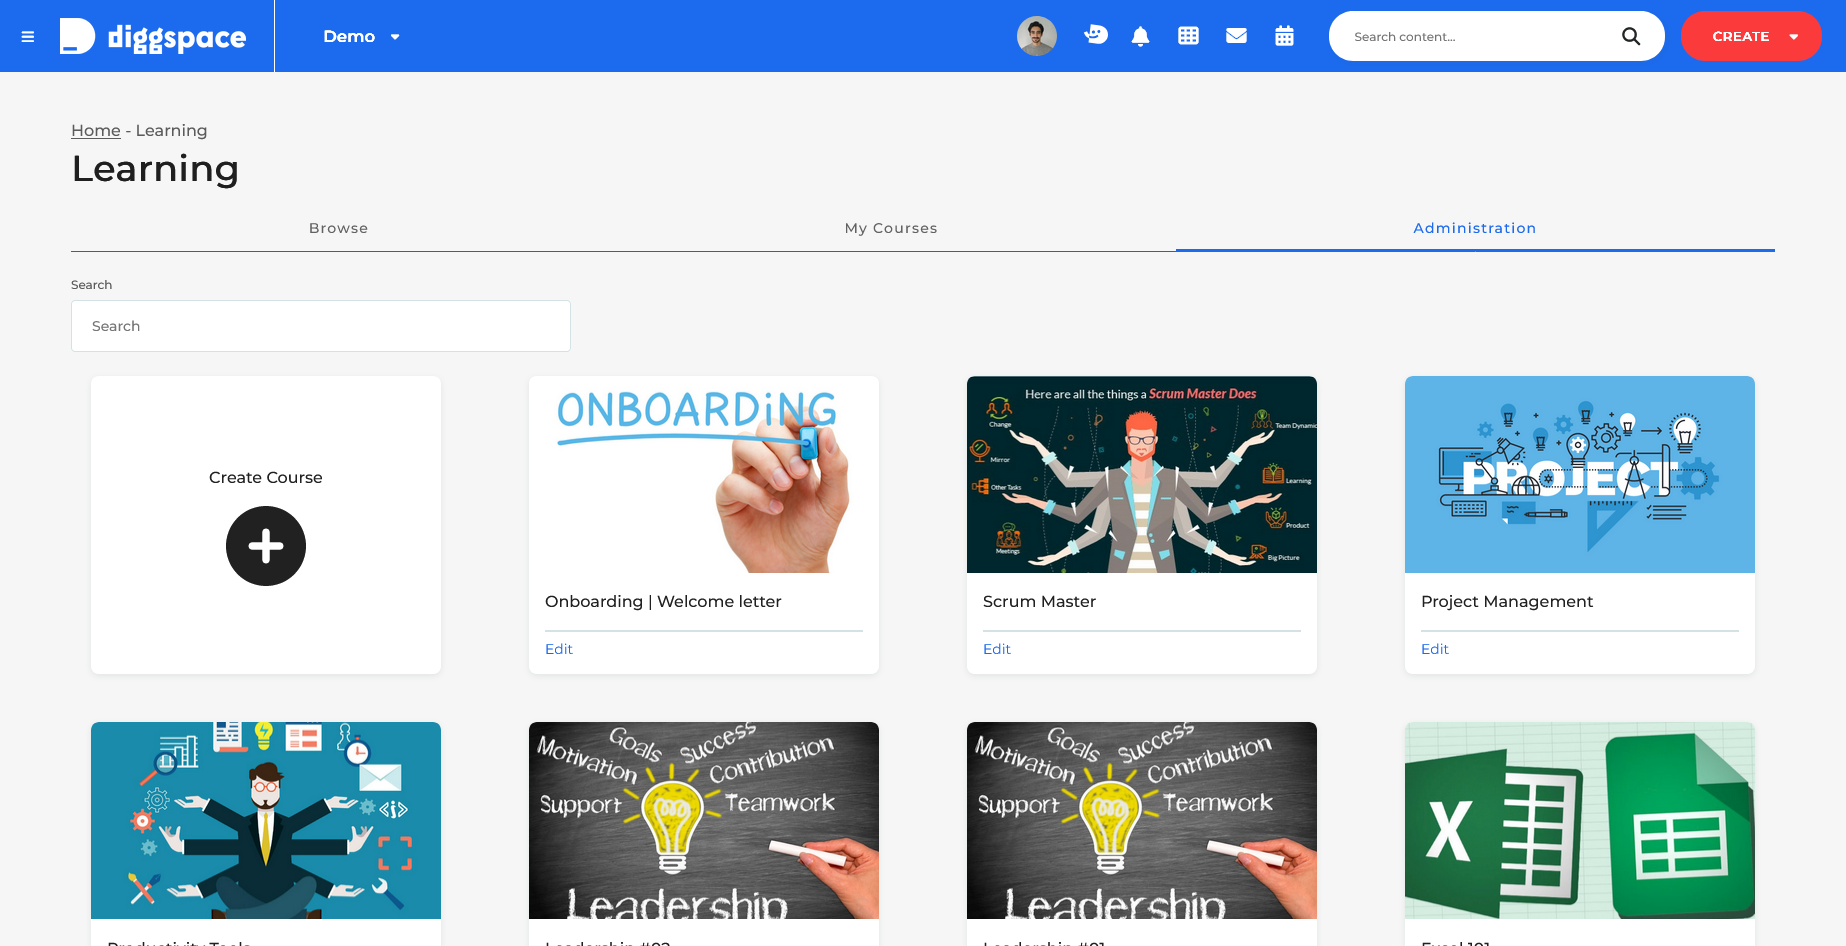
Course Overview
In the Overview tab, you have the basic course settings, which define how this course will be viewed by the portal's users.
You can configure the following fields:
- Name - the title of the course that is displayed in the card. Choose something descriptive and clear to ensure your users can tell right away what the course is about and entice them to open the course.
- Description - an introduction to the course content. This will be displayed once the user opens the course before starting it. Use this to go over the purpose of the course and what they will get out of it. This is your chance to seal the deal and get the user to start the course.
- Image - the image displayed on the course card.
- Administrators - if this course is managed by someone (e.g. a department head) that does not have full administrator privileges over all course, you can add them here to make sure they can edit the course and track the progress of the participants in the course.
- Target Audience - the groups of people who will have access to this course. If you leave this empty, everyone can view the course, otherwise, only people from the selected groups will be able to view and complete the course. You can use this to ensure that the learning page does not get filled with courses that are not relevant to everyone.
- Publish Date - the date when you want the course to be published.
Adding chapters
After setting up the basics of the course, it's time to start building out the content of each lesson in the course. This is done through chapters.
To create a chapter, simply click Add chapter on the left-hand side. This will lead you to that chapter's editor.
For each chapter, you'll be able to configure:
- Name - the chapter name, which is displayed on the course navigation
- Description - the content of the chapter. This is where you will teach your users. Make sure the content is light and engaging to avoid losing their attention.
- Questions - you can add questions to test the knowledge acquired during the chapter.
Adding questions
Currently, Diggspace supports two types of questions in course chapters:
- Text Question - users write text to answer your question, and you provide valid answers that they may give.
- Multiple Choice Question - you provide the user with multiple choices, and they have to choose one or all the right options.
When answering the questions in the course, your users will be alerted if they answered incorrectly, and be given chances until they get the answer right.
Publishing the course
Once you've setup all the course chapters, you can click on Publish to make the course available to your users.
If you configured a Publish Date, the course will only be made available at the chosen date.
Once the course has been published, you can always go back to the Administration tab to update the course. This option will also be available to users you've added as administrators in the course settings.
Related Articles
Introduction to the Learning module
The Learning module is where you can create short courses to ensure your employees have all the necessary formative information needed. When opening the Learning page, users can browse available courses, see the courses they've started and their ...What's new?
Here you can find a list of the bigger features as we release them. Learning Improvements - June 12, 2026 With this update, we introduced several improvements to better support a wider range of company training needs, requirements, and use cases. ...Introduction to Channels
Channels are the core of your portal's information organization. They serve as hubs for information on the topics you want to promote and discuss. Channels can be used for many different things: Sharing company news and events Organizing work ...Channel Pages
Channel pages let you organize information in a structured manner. This makes it easier to find relevant content well after it has been published, making it useful for sharing evergreen information. Configuring Pages To enable pages in any channel, ...Channel Permissions
Channel Staff Channels allow for granular control of content creation permissions by defining user roles. The channel staff will be the list of trusted users to whom you delegated these user roles. There are currently four roles that a user may take: ...